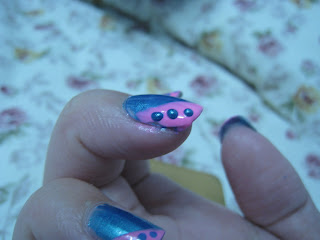
There was a mattress accident last Tuesday and half the nail of my middle finger (no offense intended) broke off. Ohhh it was painful. But the first thing that came to my mind was how I could still keep the nail on so the nail bed would not be exposed. Which is when I turned to nail polish, funny how my little hobby got me thinking on my feet!
So today I renew the process because the last one done wasn't very secure. Today, I got it all planned out :)
 |
Step 1: Identify damage
See the crack line. It use to be higher up near mid-section but good thing my nails grow fast :) |
|
|
|
 |
Step 2: Add a tape to hold onto crack (like a band-aid!)
Start off with a base coat to hold nails, then when coat has dried (impt: must let it dry) you can add on the band-aid and put on another coat to make polish application easier |
 |
Step 3: Color it
You can start to apply 2 coats of nail polish to hide, and to strengthen the nail. Make sure the second coat is still wet before you proceed to the next step |
| |
| |
 |
Step 4: Fake nail it
Remember those fake nails I bought to use for practice? Life-saver they are, I put on one while the blue coat is still wet and then press it on tightly to stick it well. Excess polish will appear at side, you can clean it up later
|
 |
| Side profile of fake nails (see the bump?) |
 |
Step 5: Only if you're vain like me :p
Because I want it to look like the rest, I applied a pink french twist |
 |
| Remember to cover the bottom edge of the nails too |
 |
| Add blue dots and it's done! |
 |
Taadaa! Pretty nails. The blue dots are kinda '3D' here, by accident!
I oughta tighten up the QC :) |


No comments:
Post a Comment